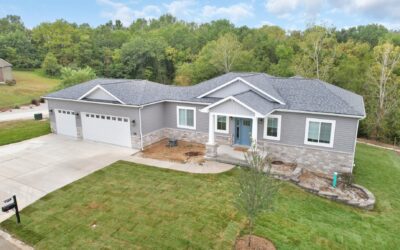
Building your dream home is a thrilling adventure. It’s a fresh start — a blank canvas where you can express your style, plan for your family’s future, and finally have a space that’s 100% yours. But ask anyone who’s done it, and they’ll tell you: it can also be one of the most stressful experiences you’ll ever take on.
There’s a good reason for that. Building a home blends the worlds of creativity, engineering, logistics, and finance. There are dozens of moving parts, hundreds of decisions to make, and occasionally, unexpected curveballs. And yet… with the right approach, it can be exciting rather than exhausting.
At Eagle Eye Builder Group, we’ve guided countless clients from the “what if” stage to walking through the front door of their finished home. Over the years, we’ve refined a process that keeps stress down and quality high. This guide will walk you through each phase — from blueprint to bliss — so you can enjoy the journey instead of dreading it.
Step 1: Finding the Right Builder
Think of your builder as the captain of your ship. You’re setting sail on a complex journey, and you need someone who not only knows how to navigate the waters but can also keep the crew calm when the weather gets rough.
Why this matters:
A good builder does more than build. They coordinate timelines, communicate with subcontractors, source materials, manage budgets, and protect your vision.
Checklist for choosing your builder:
- Portfolio: Have they built homes similar to what you want?
- Credentials: Are they licensed, insured, and in good standing with local building authorities?
- References: Can they provide recent client contacts you can speak to?
- Communication Style: Do they respond quickly? Do they explain things clearly?
Pro Tip: Ask them about a time something went wrong on a project and how they fixed it. The best builders will be honest and confident, not defensive.
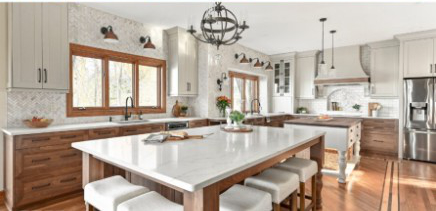
Step 2: The Design Phase — Dream Meets Reality
This is the fun part — but it’s also where reality begins to influence your vision. You’ll work with a designer or architect to translate your wishlist into blueprints that can actually be built within your budget and local regulations.
What to expect:
- Initial Consultation: You’ll share your lifestyle needs, style preferences, and budget range.
- Site Review: The lot you choose can influence your design due to slope, sunlight, and local building codes.
- Preliminary Plans: First drafts of floor plans and elevations.
- Revisions: Tweaks to optimize flow, functionality, and cost efficiency.
Common Pitfall: Overdesigning. It’s tempting to plan for features you’ve seen online, but if you never use that two-story library or massive wine cellar, it’s just wasted square footage and money.
Step 3: Budgeting — Where the Rubber Meets the Road
A realistic budget isn’t just about what you want to spend; it’s about anticipating what you might need to spend. Even the most carefully planned build can encounter surprises — and that’s okay if you’re prepared.
How to set a smart budget:
- Include a 10–15% contingency fund for surprises (like hitting unexpected rock during excavation or deciding on a more premium finish).
- Be upfront with your builder about your max budget so they can guide you toward cost-effective solutions.
- Prioritize must-haves vs. nice-to-haves. If the budget gets tight, you’ll know what can be adjusted.
Real-World Example: One client wanted to skip a $500 soil test. That decision would have been a $9,000 mistake when the crew discovered unstable clay soil that required foundation reinforcement. Because we insisted on the test, we caught it early and saved them thousands.
Step 4: Permits, Codes, and Compliance
Paperwork might not be glamorous, but it’s one of the most critical steps in protecting your investment. Each municipality has its own building codes, permit processes, and inspection schedules.
What your builder should handle:
- Submitting all necessary permit applications
- Coordinating with inspectors at required stages
- Ensuring the design meets current code requirements
Why it matters: Skipping permits or cutting corners can lead to fines, delays, and even legal issues down the road — not to mention safety hazards.
Step 5: Breaking Ground — and Staying Sane During Construction
Here’s where the excitement ramps up. You’ll see your home literally take shape from the ground up. That said, it’s also where emotions can swing between elation and impatience.
How to avoid builder burnout:
- Schedule regular site visits rather than dropping in daily.
- Use milestone updates: foundation complete, framing done, drywall up, etc.
- Let the builder manage day-to-day logistics — too many cooks on site can slow progress.
Pro Tip: Keep a build journal or photo log. It’s a great way to track progress, document decisions, and have a visual record for future reference.
Step 6: Final Walkthrough and Punch List
When construction is complete, you’ll do a final walkthrough to identify any items that need fixing before move-in. This is your chance to ensure everything meets your expectations.
What to check:
- Cosmetic: Paint finish, grout lines, trim work
- Functional: Plumbing fixtures, door alignment, lighting
- Safety: Handrails, smoke detectors, outdoor lighting
Tip: Bring a friend with a fresh perspective — they might notice details you miss.
Step 7: Move-In Day and Beyond
You’ve made it! The boxes are stacked, the keys are in your hand, and the house is officially yours. But the relationship with your builder doesn’t end there. A good builder will check in after a few months to address any settling issues or warranty concerns.
The Eagle Eye Advantage
At Eagle Eye Builder Group, we approach every build with the same principles:
- Transparency: You’ll always know where your project stands.
- Quality: We don’t cut corners — even the ones you can’t see.
- Partnership: We’re here to guide you, not just build for you.
Because building your dream home isn’t just about the house — it’s about the journey to get there.